Creating Defects
Creating Defects
The set of fields you populate when creating a defect differs depending on the issue-tracking system you use. To learn how to create a defect in Zephyr, select the issue-tracking system used in your project:
Jira integrated with Zephyr.
Zephyr's built-in issue tracking system
Jira integrated with Zephyr
To create a new defect:
Required fields:
Project | The name of your project. |
Issues Type | The type of your issue. The following options are available:
|
Summary | A short description of the issue. |
Description | Detailed information about the issue. |
Reporter | The user who reported the issue. |
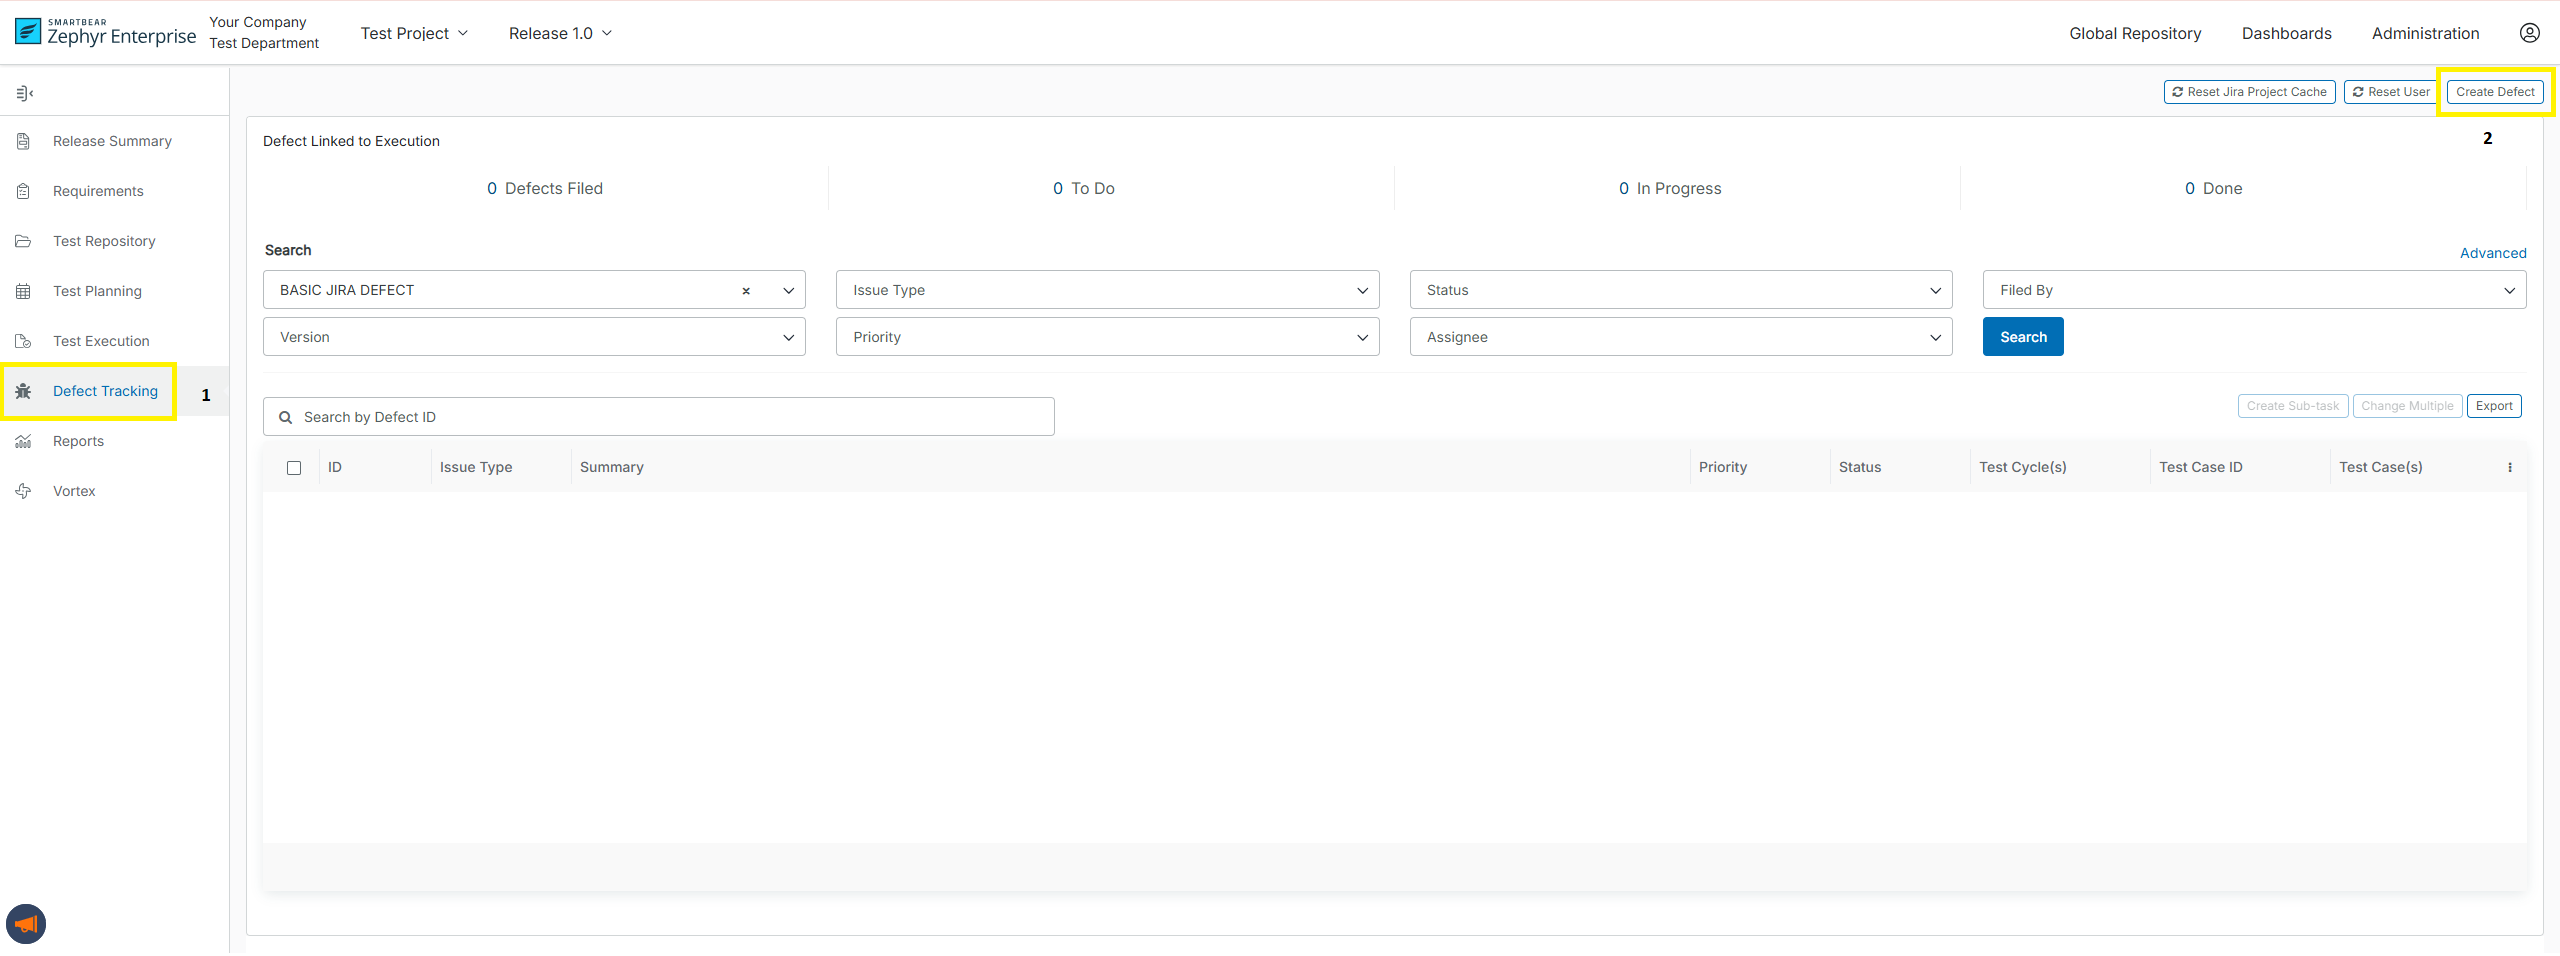
Click Defect Tracking on the navigation pane on the left, then click Create Defect in the top-right corner of the Defect Tracking window.
Note
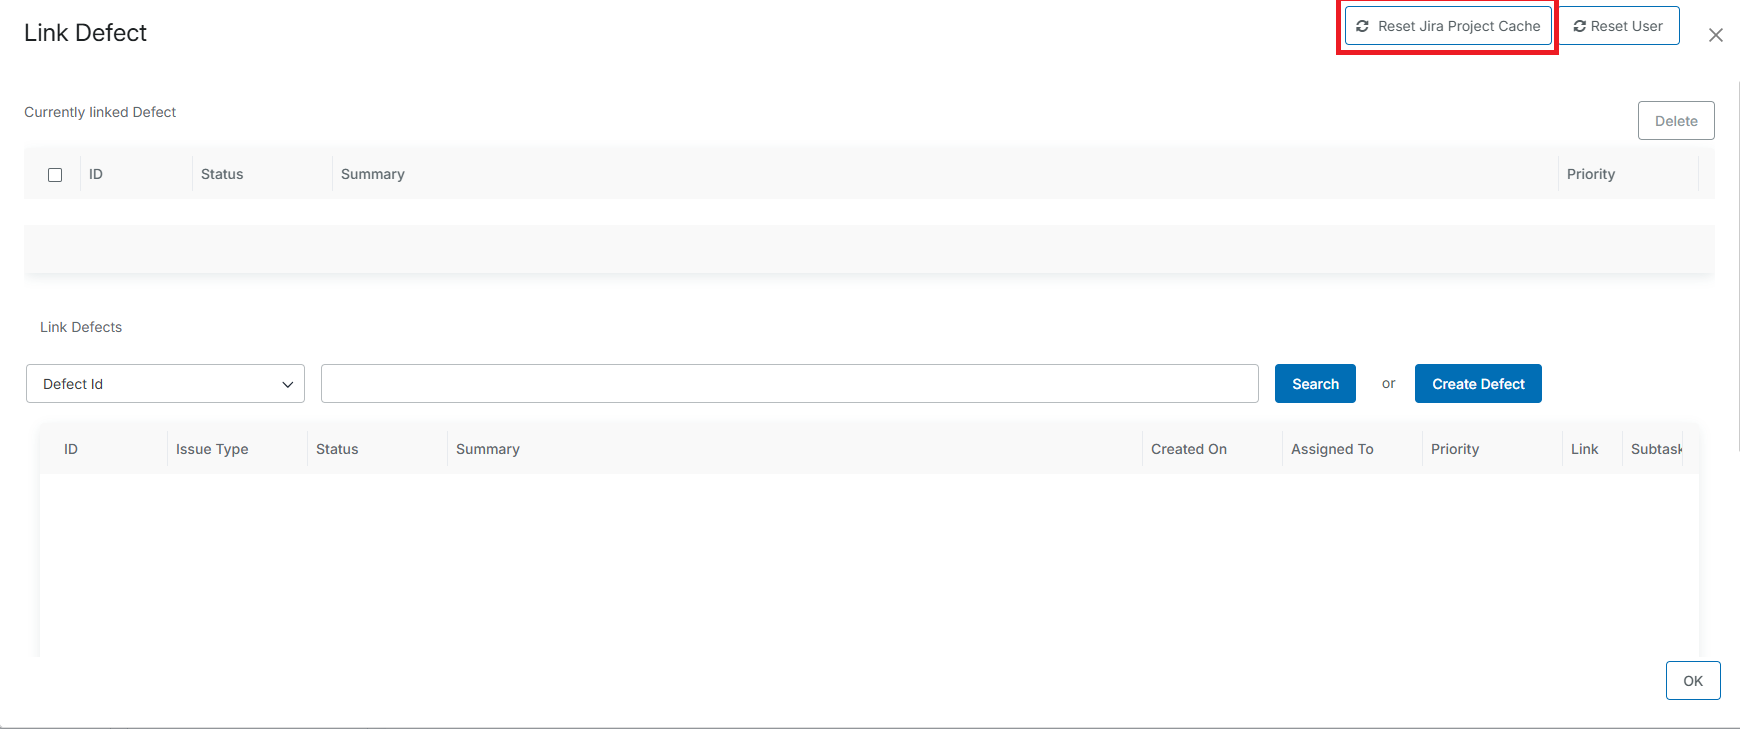
Click Reset Jira Project Cache to find your project in the list and reset the Jira project cache. This clears and rebuilds the cached project data related to Jira projects in ZE.
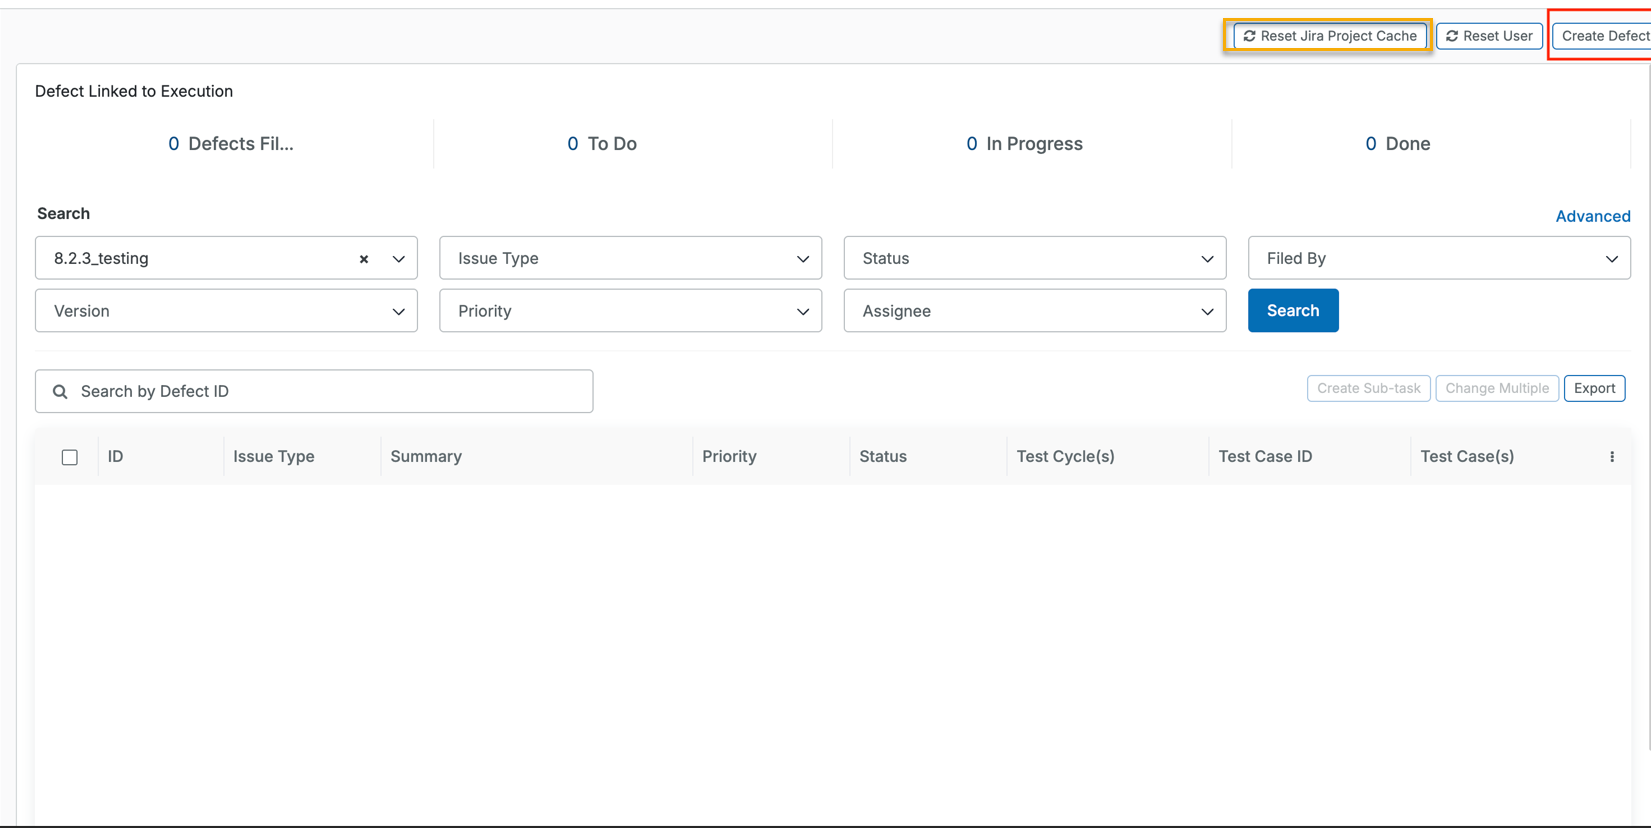
In the subsequent dialog, select the project for which you want to create a defect from the drop-down menu, select an issue type, and click Next.
Important
If your project administrator chooses to file defects directly in Jira, clicking on Next will open a new tab with Jira's Create issue dialog. Otherwise, you will continue creating the defect using Zephyr’s File New Defect dialog (see below). To learn how to create issues in Jira, see Jira documentation.
In the resulting window, populate all the required fields (marked with a red asterisk) and specify any relevant information in the other fields, if needed.
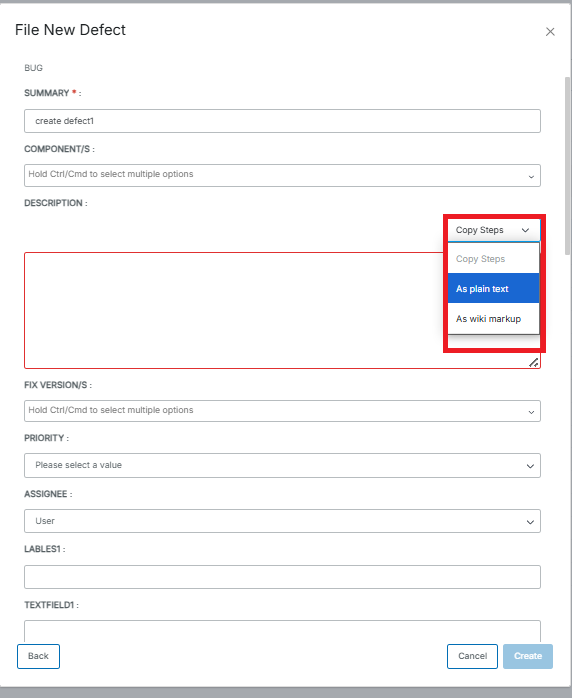
After populating the fields, click Create.
Important
If you don’t specify a value in the Priority field, Zephyr will set the default value to
Zephyr will show the Update Defect window (see below), where you can check the specified information, enter additional values, and attach files to your issue.
Important
The total size of the attached files cannot exceed 20 MB.
Click Update to complete the issue creation. Once done, you will be able to find the issue in Jira.
Important
When using Jira for defect tracking, the Jira fields on the Create and Edit screens MUST be the same, otherwise users won't be able to properly file/modify defects.
Refer to this Jira resource for more information.
Create a defect from the Test Execution page
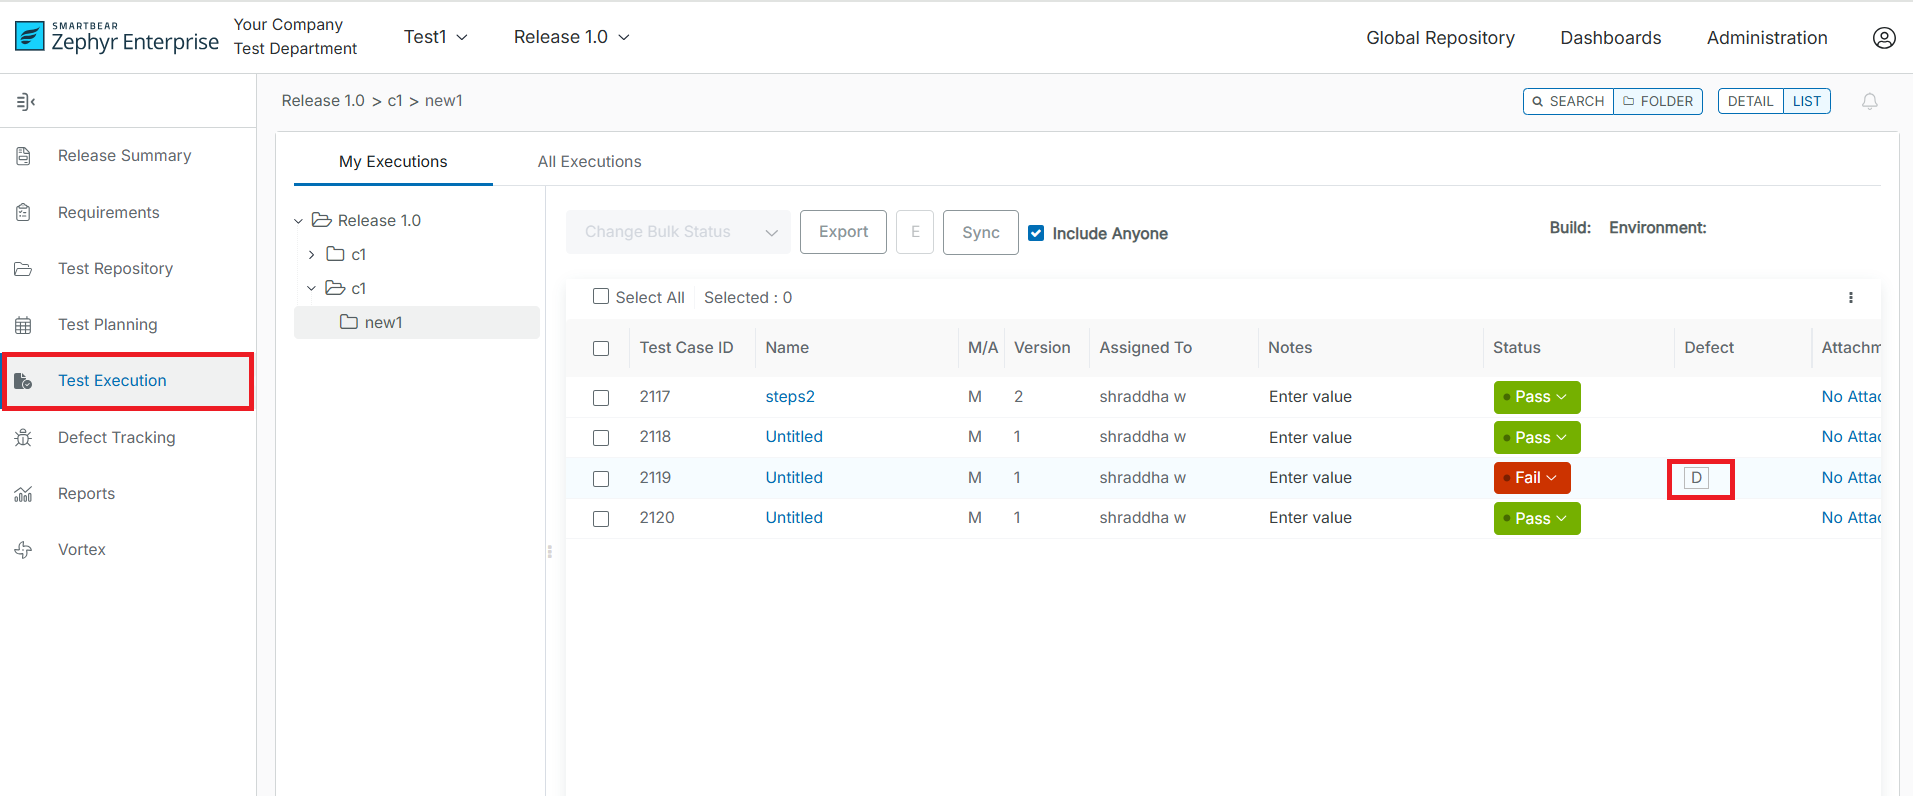
You can also create defects during test execution. It’s possible to do that only when the status of your test is Fail. In this case, Zephyr shows the [D] icon in the Defect column of the failed test. Click it to link an existing defect to the test execution, or to create and link a new defect.
Click Reset Jira Project Cache to find your project in the list and reset the Jira project cache. This clears and rebuilds the cached project data related to Jira projects in ZE.
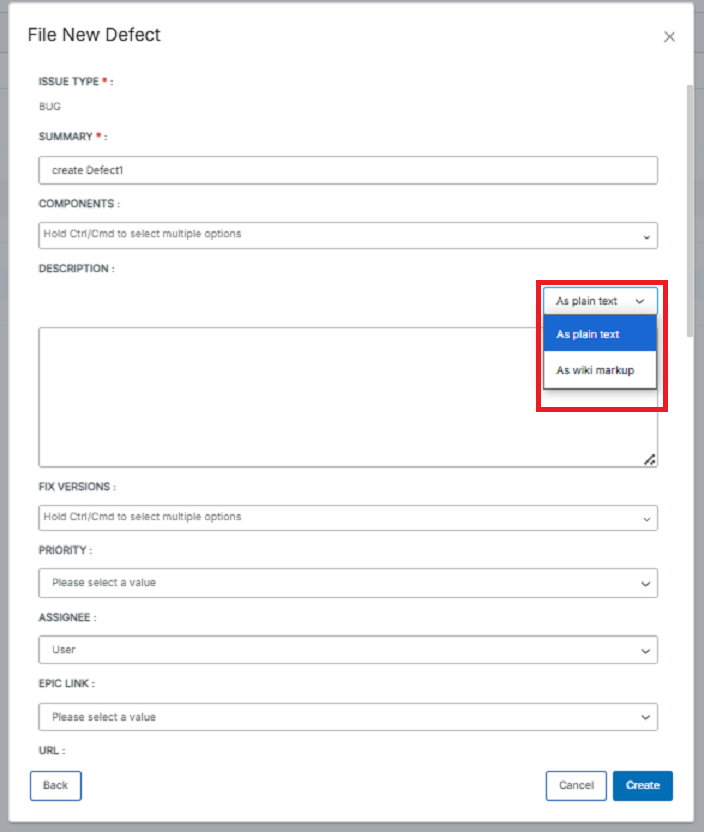
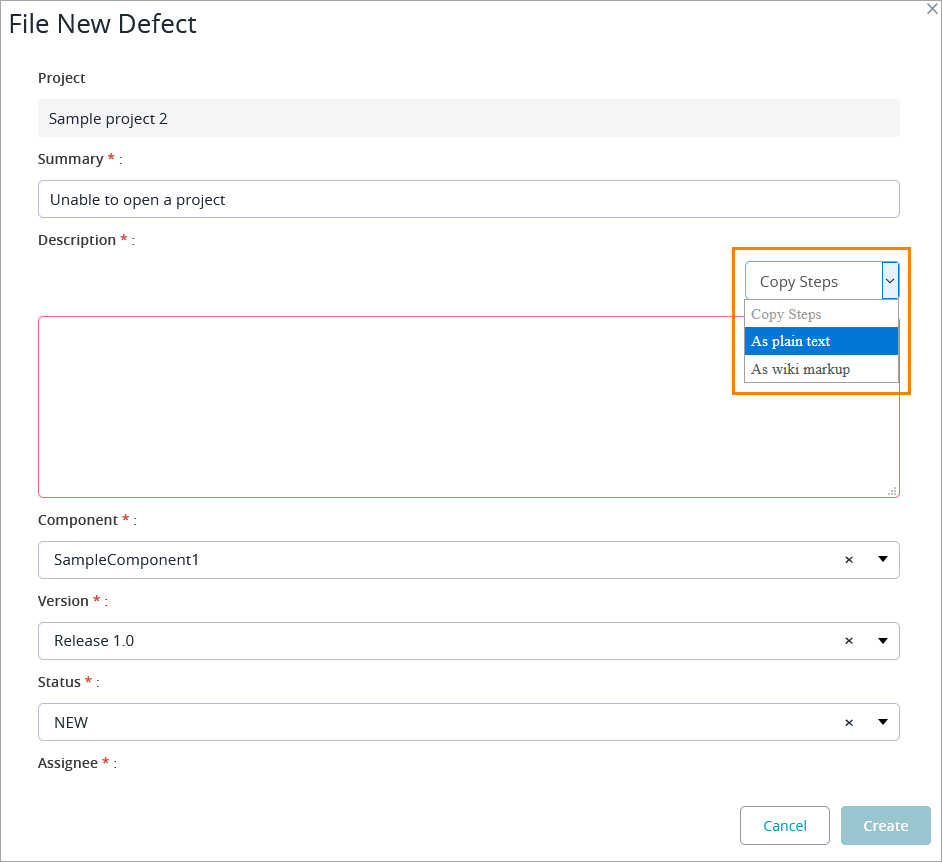
When creating a defect from the Test Execution page, you can also copy the steps of the failed test to the defect’s Description field. To do that, open the Copy Steps dropdown on the right and choose either As plain text or As wiki markup – Zephyr will automatically copy all the steps in the selected format.
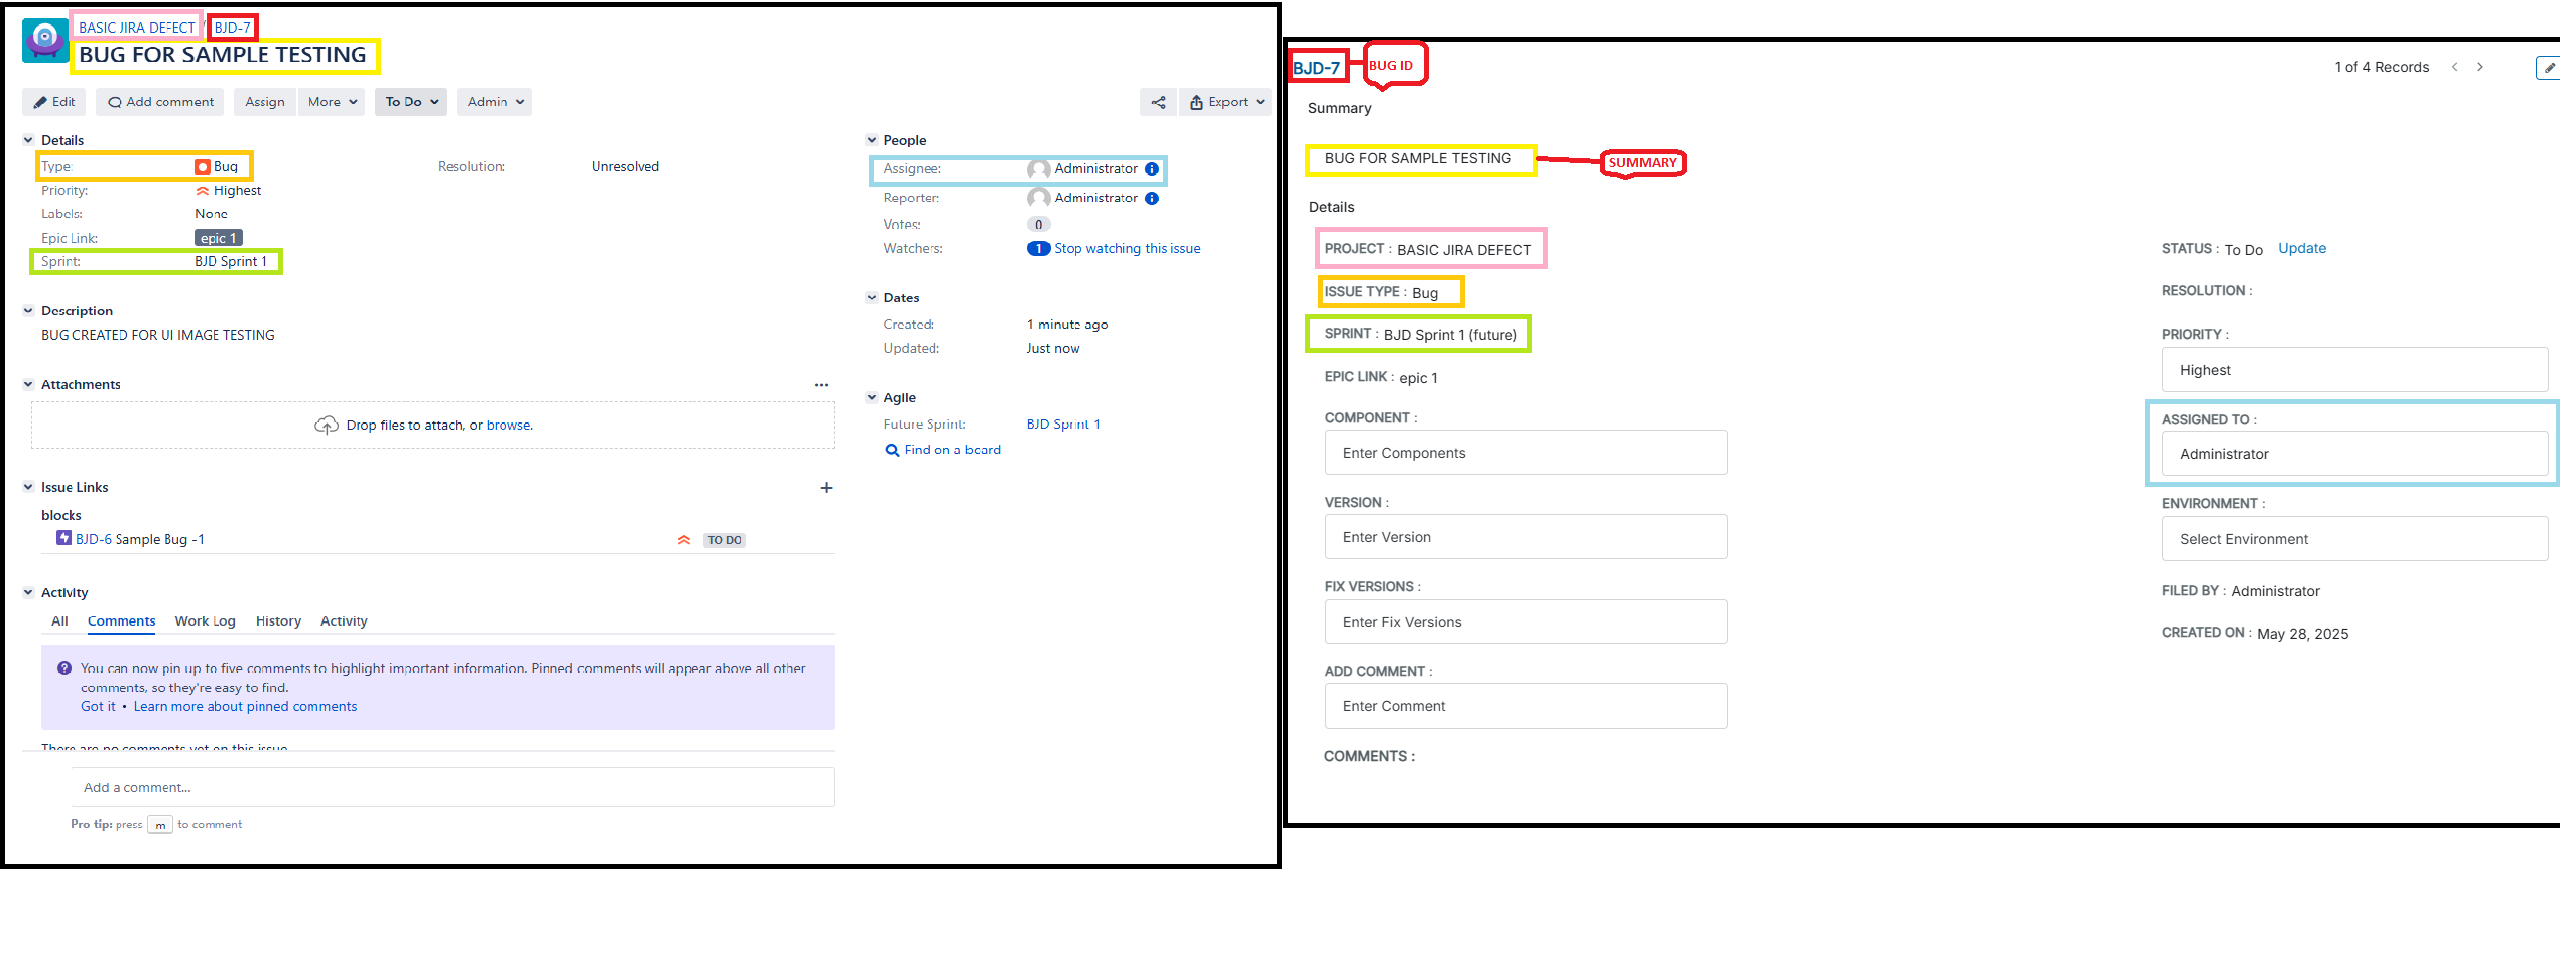
The Update Defect window
The window shows your issue's values in Jira, including the values of the Sprint, Epic Link, Linked Issues, and Team options.
If you update the values in Jira, you may not see them in Zephyr immediately, as the latter shows cached data. Zephyr updates the data every two hours, unless the administrator clears the cache on the Administration > Defect Admin page.
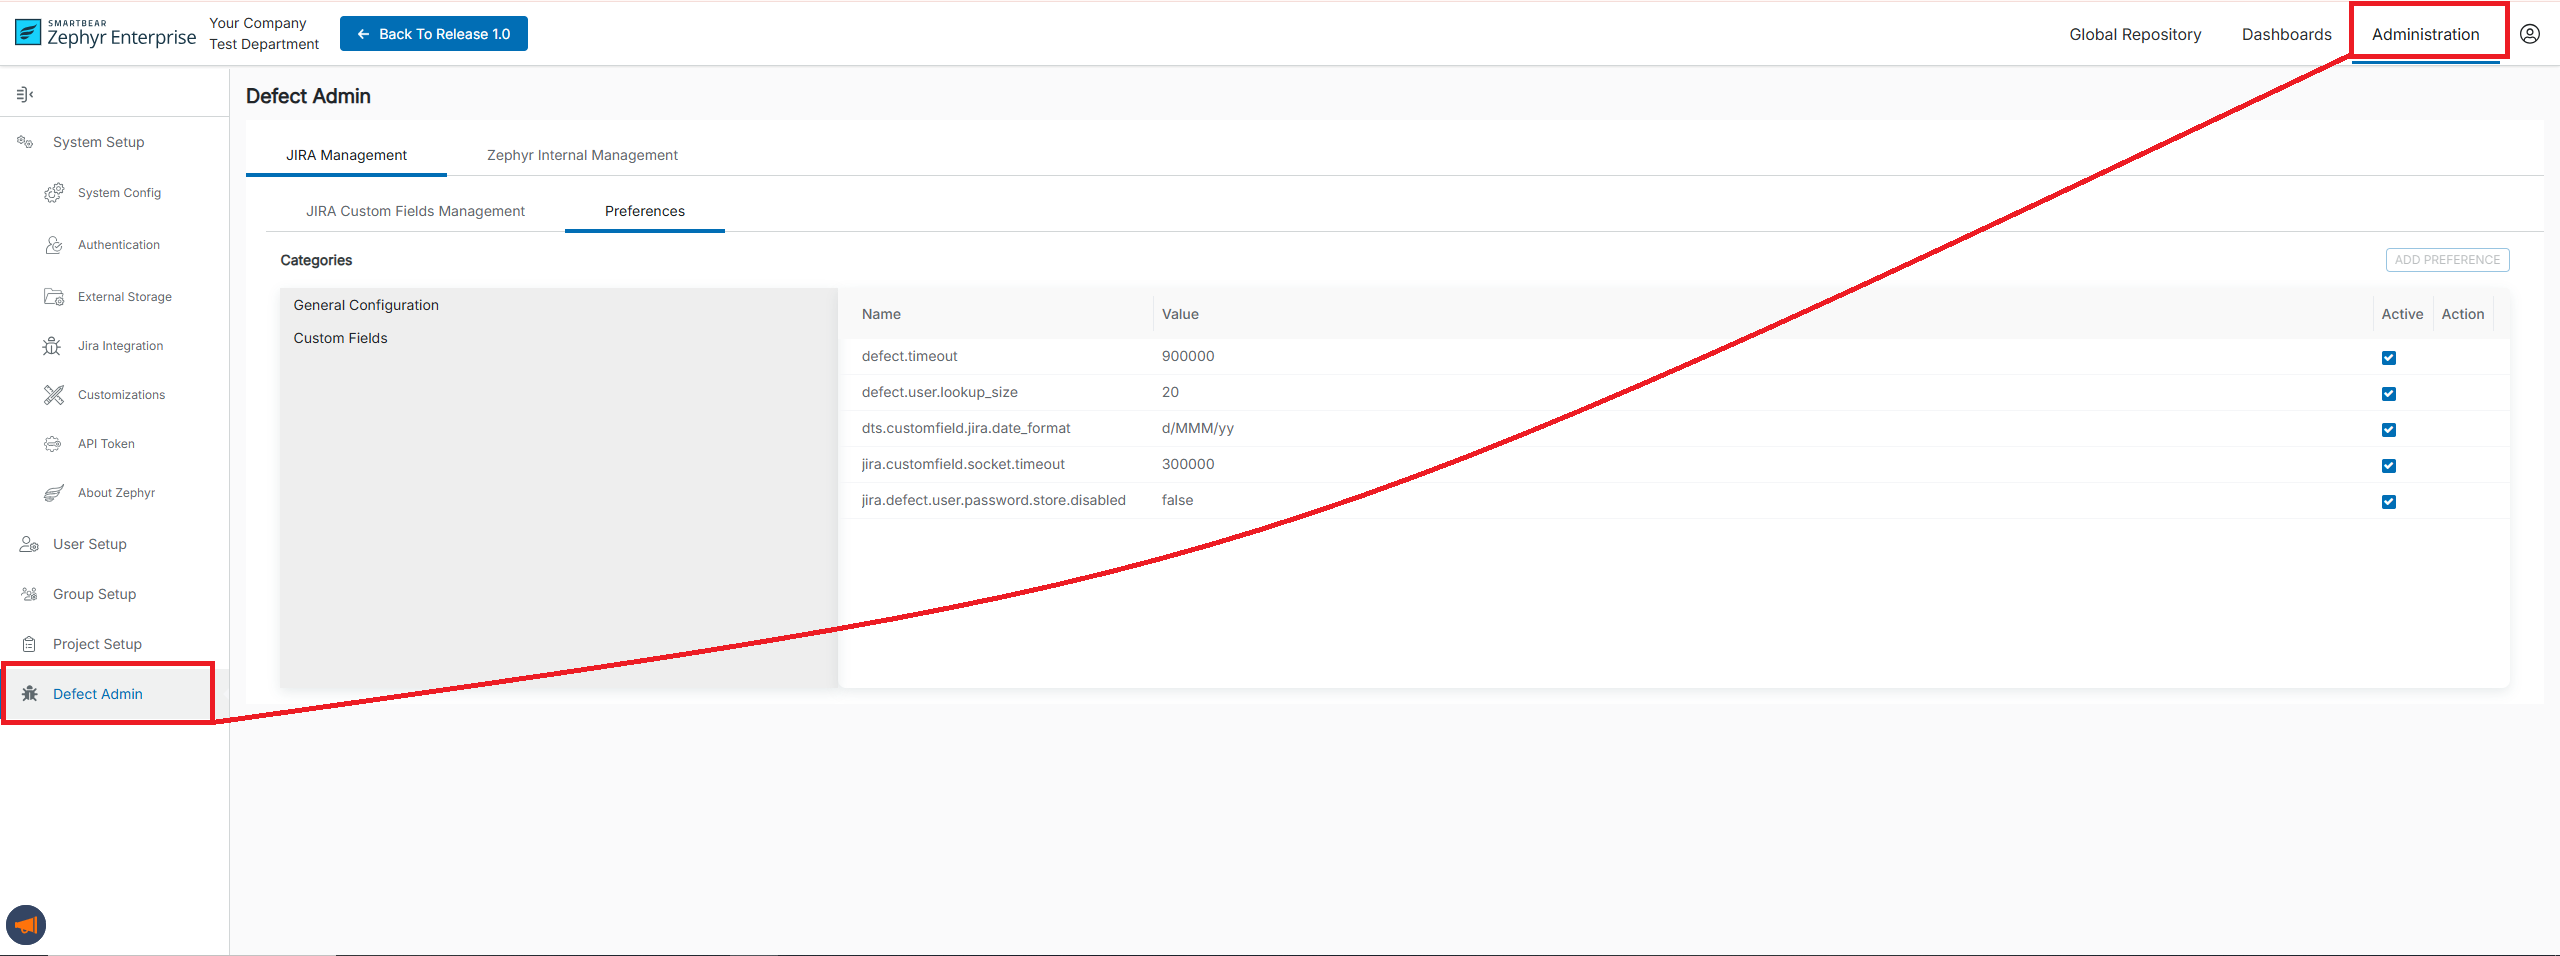
So, if, for example, a new Sprint value has been specified in Jira and you don’t see it in Zephyr, you may ask the administrator to clear the cache for the Jira options.
Zephyr's built-in issue-tracking system
To create a new defect:
Click Defect Tracking on the navigation pane on the left, and then click Create Defect in the top-right corner of the Defect Tracking window.
In the subsequent dialog, fill in all the required fields. Enter details in other fields, if required.
Available Fields:
Summary (required)
A short description of the issue.
Description (required)
Detailed information about the issue.
Component
The component the defect relates to.
Version
The current version of your project.
Status (required)
The defect status. Possible values:
New
Assigned
Fixed
Rejected
Verified
Reopened
Closed
Assignee (required)
The user the defect will be assigned to.
OS
The operating system used. Possible values:
Windows
Mac OS
Linux
Other
All
Priority
The defect priority ranges from P1 to P5, where P1 is the highest priority.
Target Milestone
The target version in which the issue should be resolved.
Severity
The defect severity. Possible values:
Fatal
Major
Minor
Trivial
Suggestion
Blocker
Hardware
The type of the computer used. Possible values:
PC
Macintosh
Other
3. After populating all the required fields, click Create. The Update Defect dialog will open:
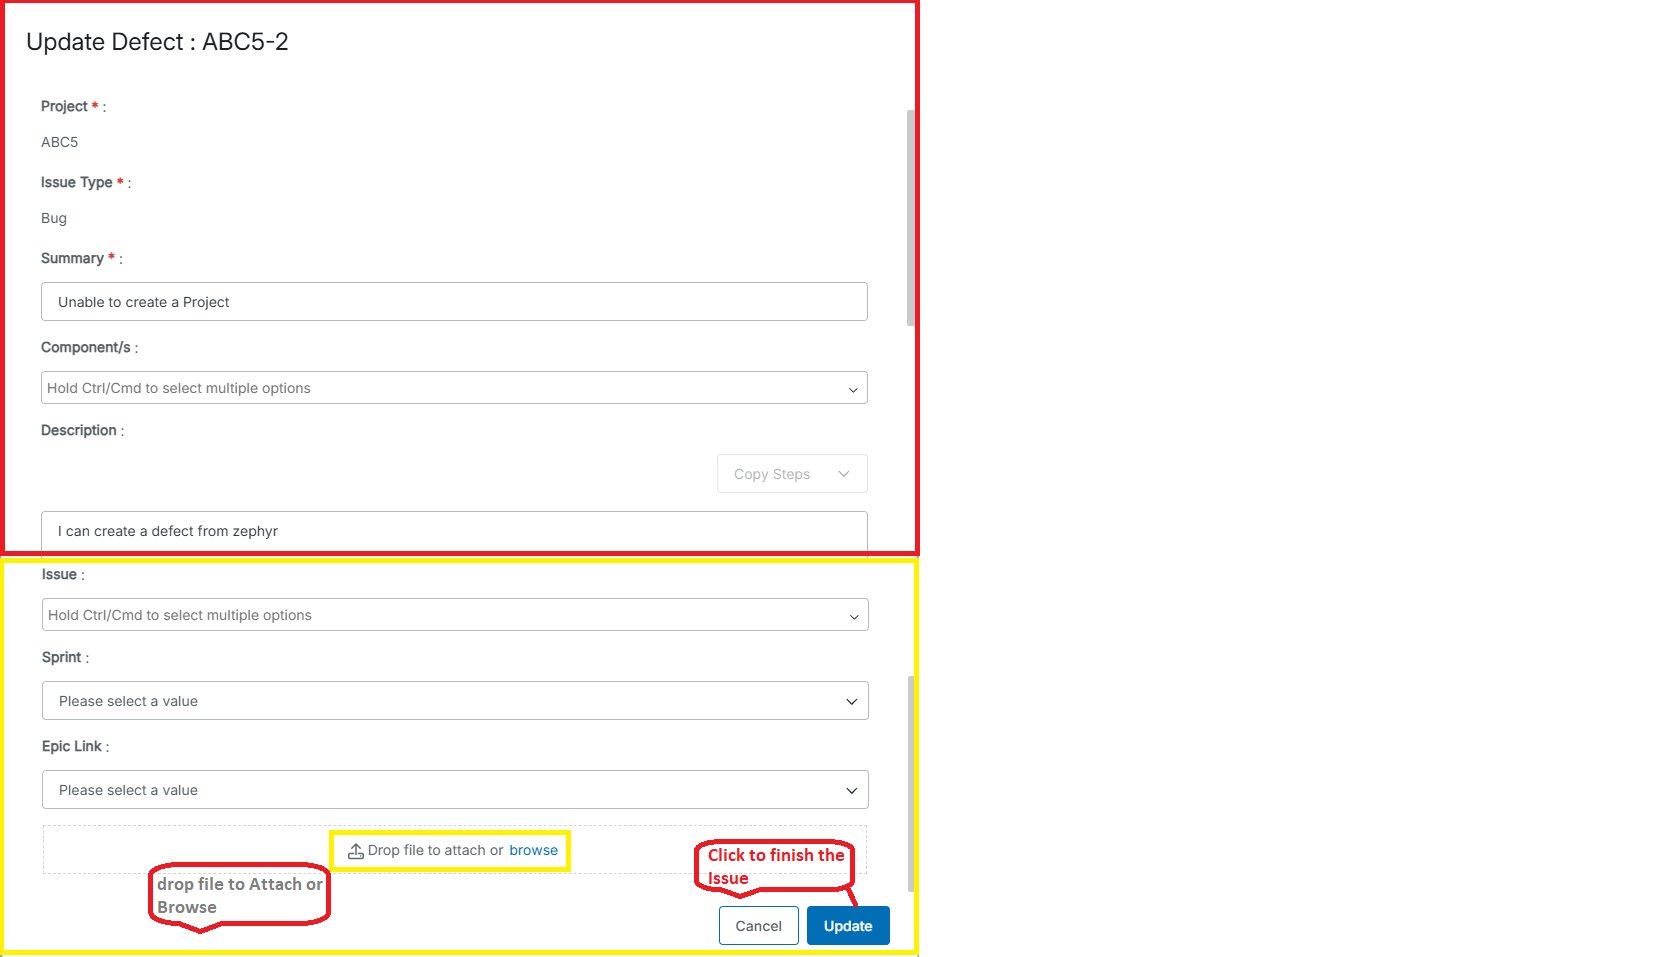
In the dialog, you can check the information you have specified, update some values, and attach files to your defect.
Note
The total size of the attached files cannot exceed 20 MB.
Once done, click Update to apply the changes.
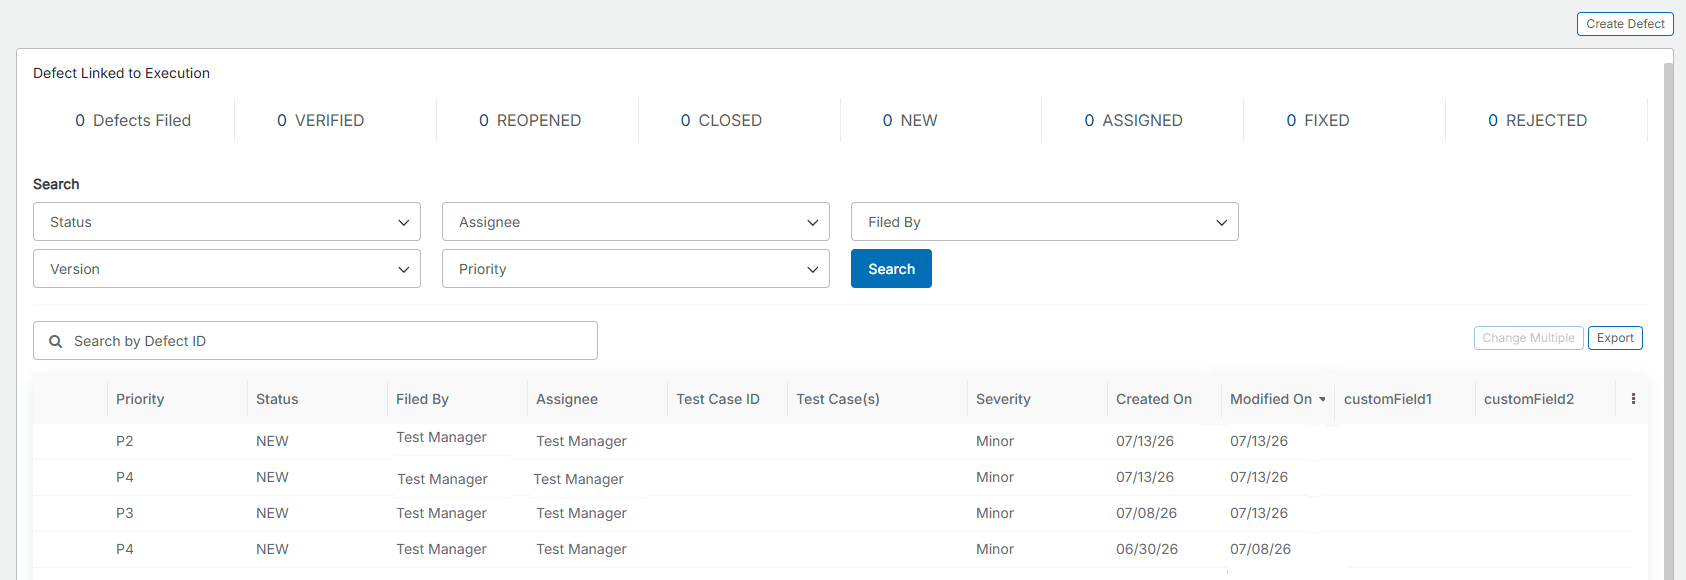
The newly created defect appears at the bottom of the page,
The Created On and Last Modified On columns on the grid help you track defect activity. The Created On column appears by default after the Severity column. The Last Modified On column is available in column selection.
Delete Attachments
Zephyr Enterprise's built-in issue-tracking system lets you delete attachments from defect records, removing outdated or unnecessary files.
To delete an attachment, do the following:
On the Update Defect screen, select the Delete icon next to the attachment.
In the confirmation dialog box, select Delete to remove the file.
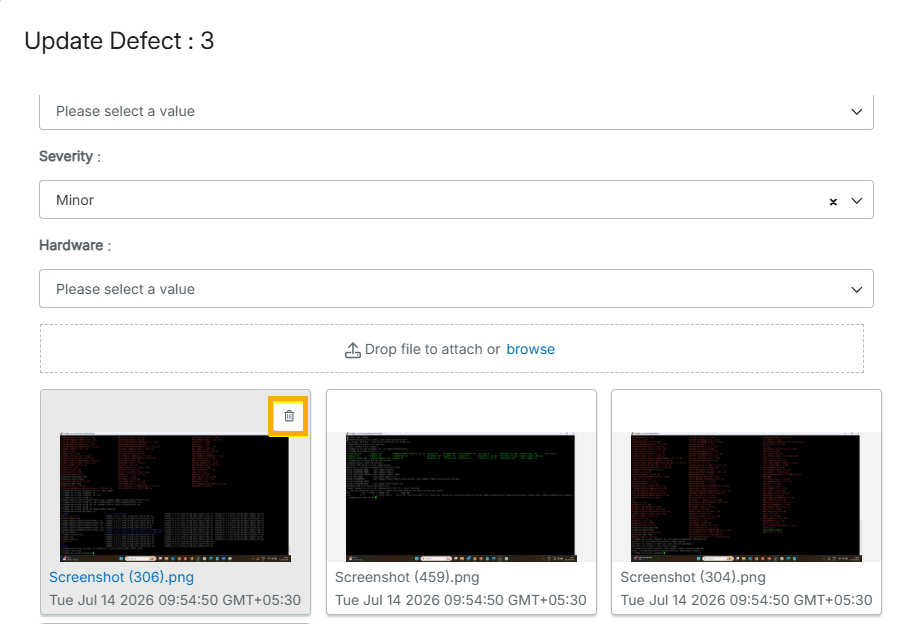
The attachment is deleted for the defect.
Create a defect from the Test Execution page
You can also create defects during test execution. It’s possible to do that only when the status of your test is Fail. In this case, Zephyr shows the [D] icon in the Defect column of the failed test. Click it to link an existing defect to the test execution, or to create and link a new defect:
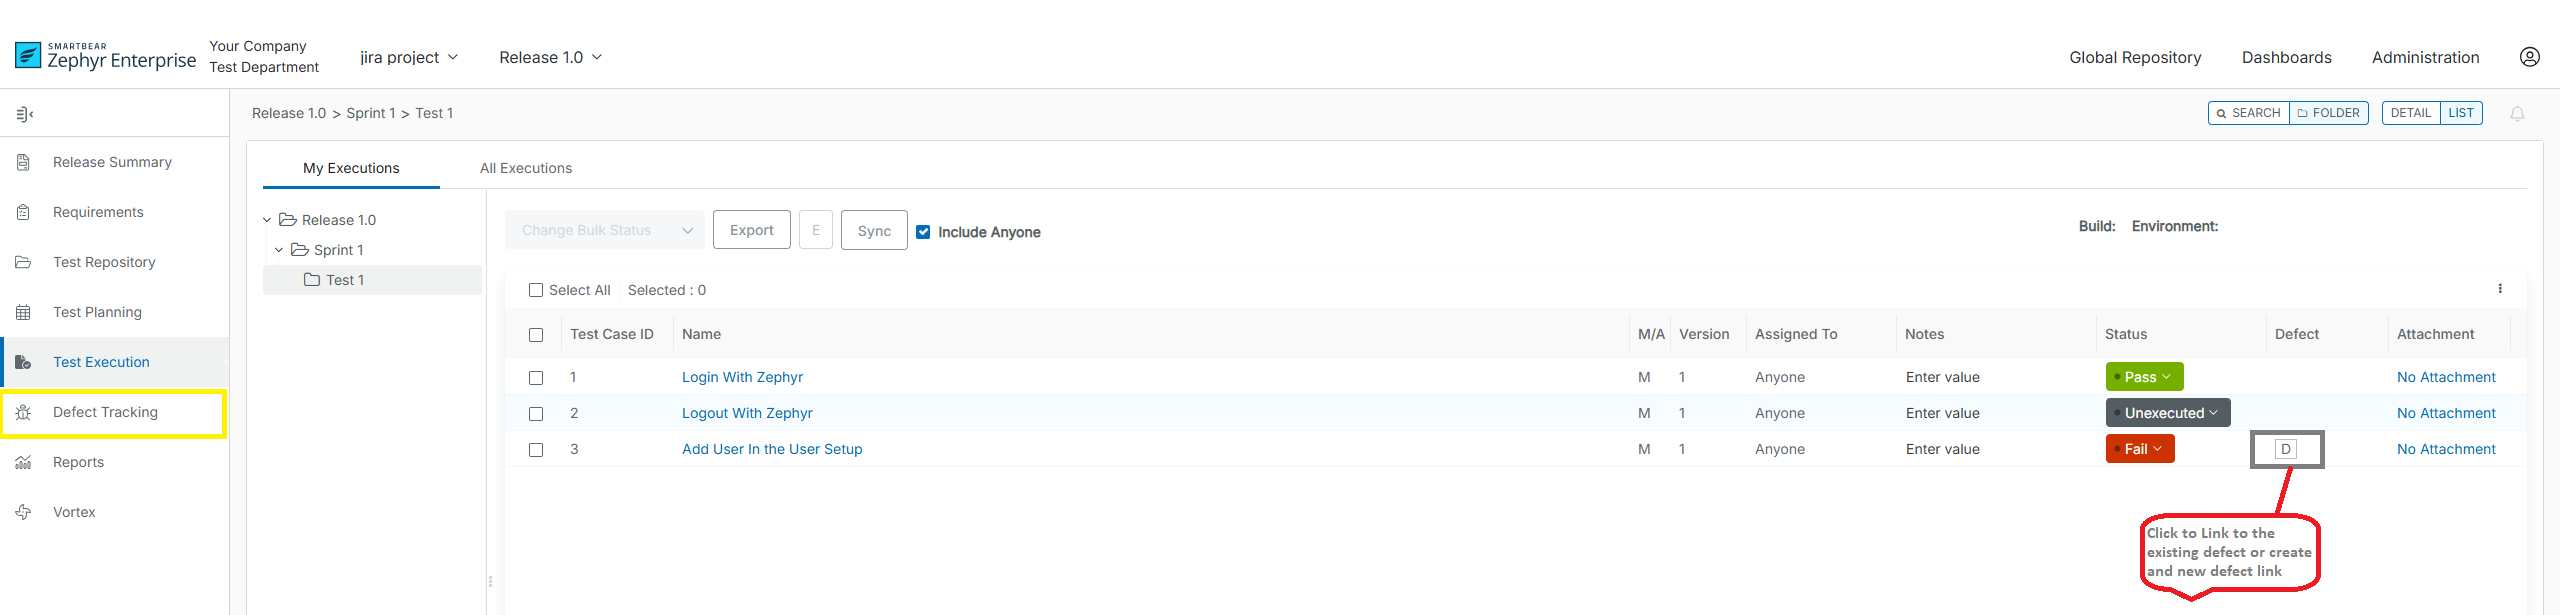
When creating a defect from the Test Execution page, you can also copy the steps of the failed test to the defect’s Description field. To do that, open the Copy Steps dropdown on the right and choose either As plain text or As wiki markup – Zephyr will automatically copy all the steps in the chosen format:
 |