Editing Defects
The way you edit defects in Zephyr depends on which issue tracking system your Zephyr administrator set up in the project settings. To learn how to edit a defect in Zephyr, select the issue tracking system you are using:
Jira integrated with Zephyr
The built-in issue tracking system
Jira integrated with Zephyr
To edit a single defect -
1. Find the defect you want to edit and select it by ticking the check box next to its ID. The defect details will be shown at the bottom of the page:

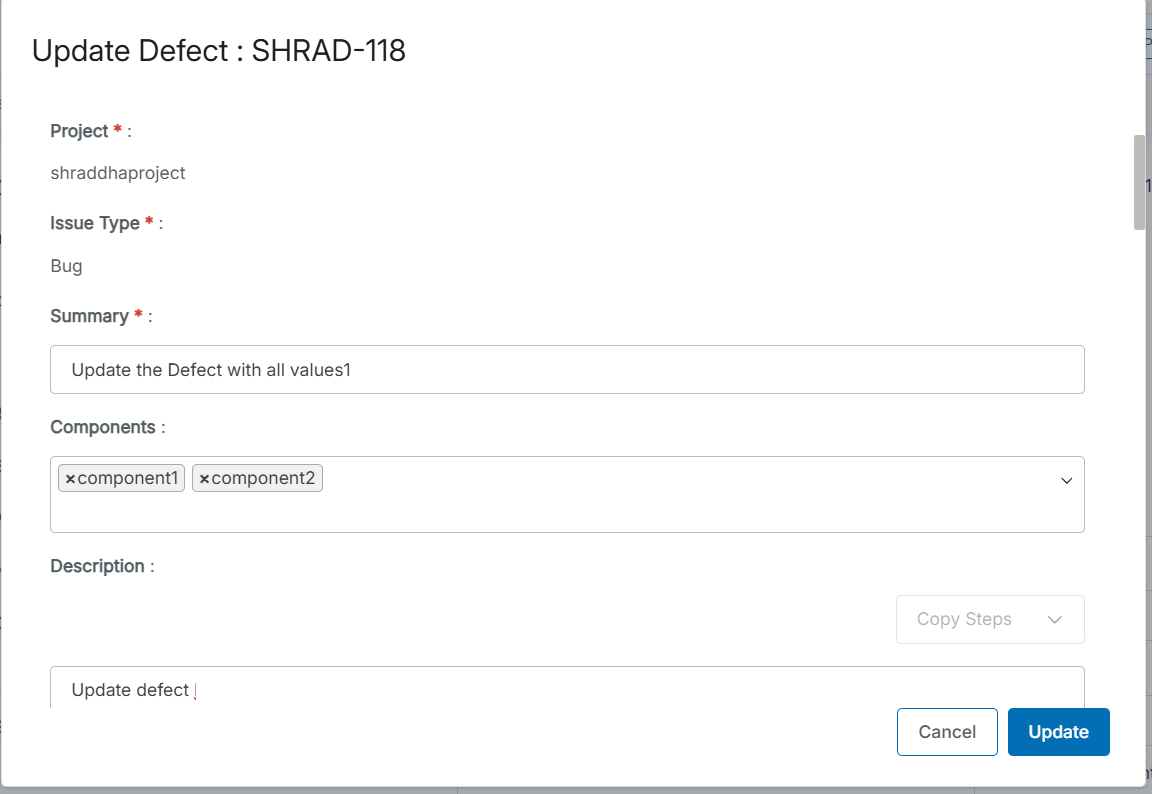
2. Click Update to change any data directly in the fields and update the values in the Update Defect dialog box.
Note
Keep in mind that all the required fields must be populated.
If you do not specify a priority, the default value will be used (Medium).
The maximum size limit for attachments is 20 MB.
3. Click Update to apply the changes.
To edit multiple defects -
1. Find the defects you want to edit and select them by ticking the check box next to their IDs.

2. Click Change Multiple and update the needed values in the subsequent dialog.
3. Click Save to apply the changes.
To edit a defect in Jira:
1. In Zephyr, find the defect you want to update and click its ID:

2. The defect will open in Jira where you can edit it:

If you are not logged in to Jira, you will be asked to log in using your Jira credentials.
The built-in issue tracking system
To edit a defect created in the internal issue tracking system –
1. Find the defect you want to edit.
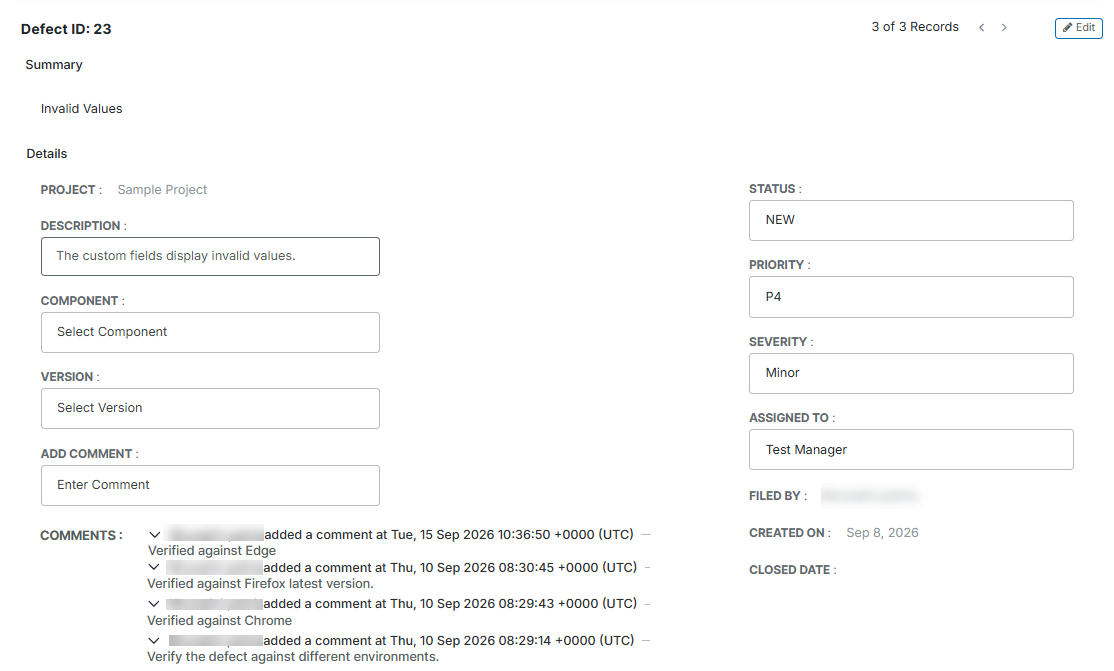
2. Choose it by selecting the check box next to its ID. The defect details will appear at the bottom of the page:

3. You can edit the values directly in the fields, or click Edit to bring up the edit form.

4. After changing the values, click Update to apply the changes.
Note
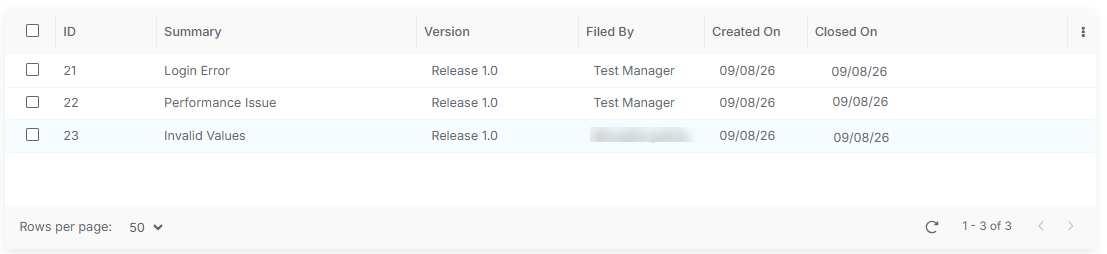
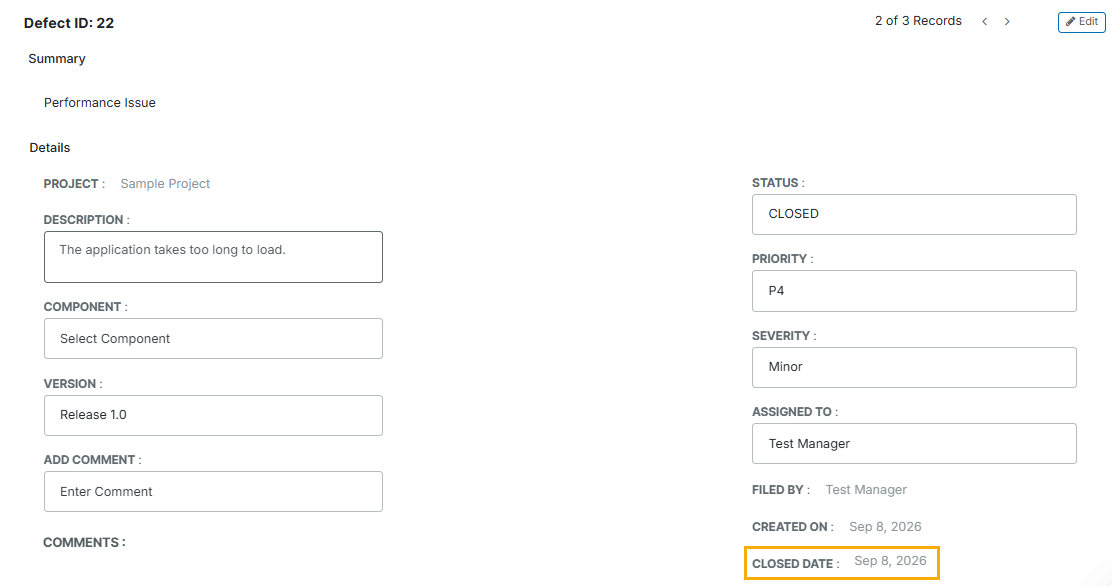
Closed On - The application automatically records the closed date when you set the defect status to Closed.
You can view the Closed On date in the grid view and on the defect details page.
On the grid, select the Closed On column in column selection to view this information.
Grid View
Detail View
Adding comments to defects
After creating a defect, you can add comments to track updates and discussions. New comments appear at the top of the Comments section without a page refresh. The Comments section lists comments by creation date, newest first, and keeps all previous comments in the comment history.