Cloning a Release
Clone a release to reuse its test cases, requirements, and cycles in a new release without recreating them. Before cloning starts, you can rename the copy, and Zephyr Enterprise checks that the name is unique.
Cloning Releases
You can select the following items to clone:
Test Repository
Attachments
Cycles
Cycle-phase assignments
Execution Results
Comments
Defect Mapping
Attachments
Step Results
Comment
Attachments
Requirements Repository
Mapping between requirements and test cases
Attachments
Documents
Important
Additional Notes on Cloning a Release
If you only need the Cycles, Phases, and Assignments, exclude cloning the execution results.
Pick the user who should be assigned test cases and their executions in the cloned release if a particular user in the original release is not a part of this project (e.g. if "Joe" was on release A and is no longer a part of the project that contains release B (which was cloned from release A), then all test cases and executions assigned to him in release B will now be assigned to a new user that is picked here.)
The Release Start Date is important.
The cloned release will have the same offset for all cycles and cycle-phases as in the original release (e.g. if cycle A started 1 week after the Start Date on the original release, then the cycle A-clone will start 1 week after this Release Start Date and so on. The length of the cycles remain the same.)
Clone a Release
Clone a release to reuse its test assets in a new release without recreating them.
To clone a release, do the following:
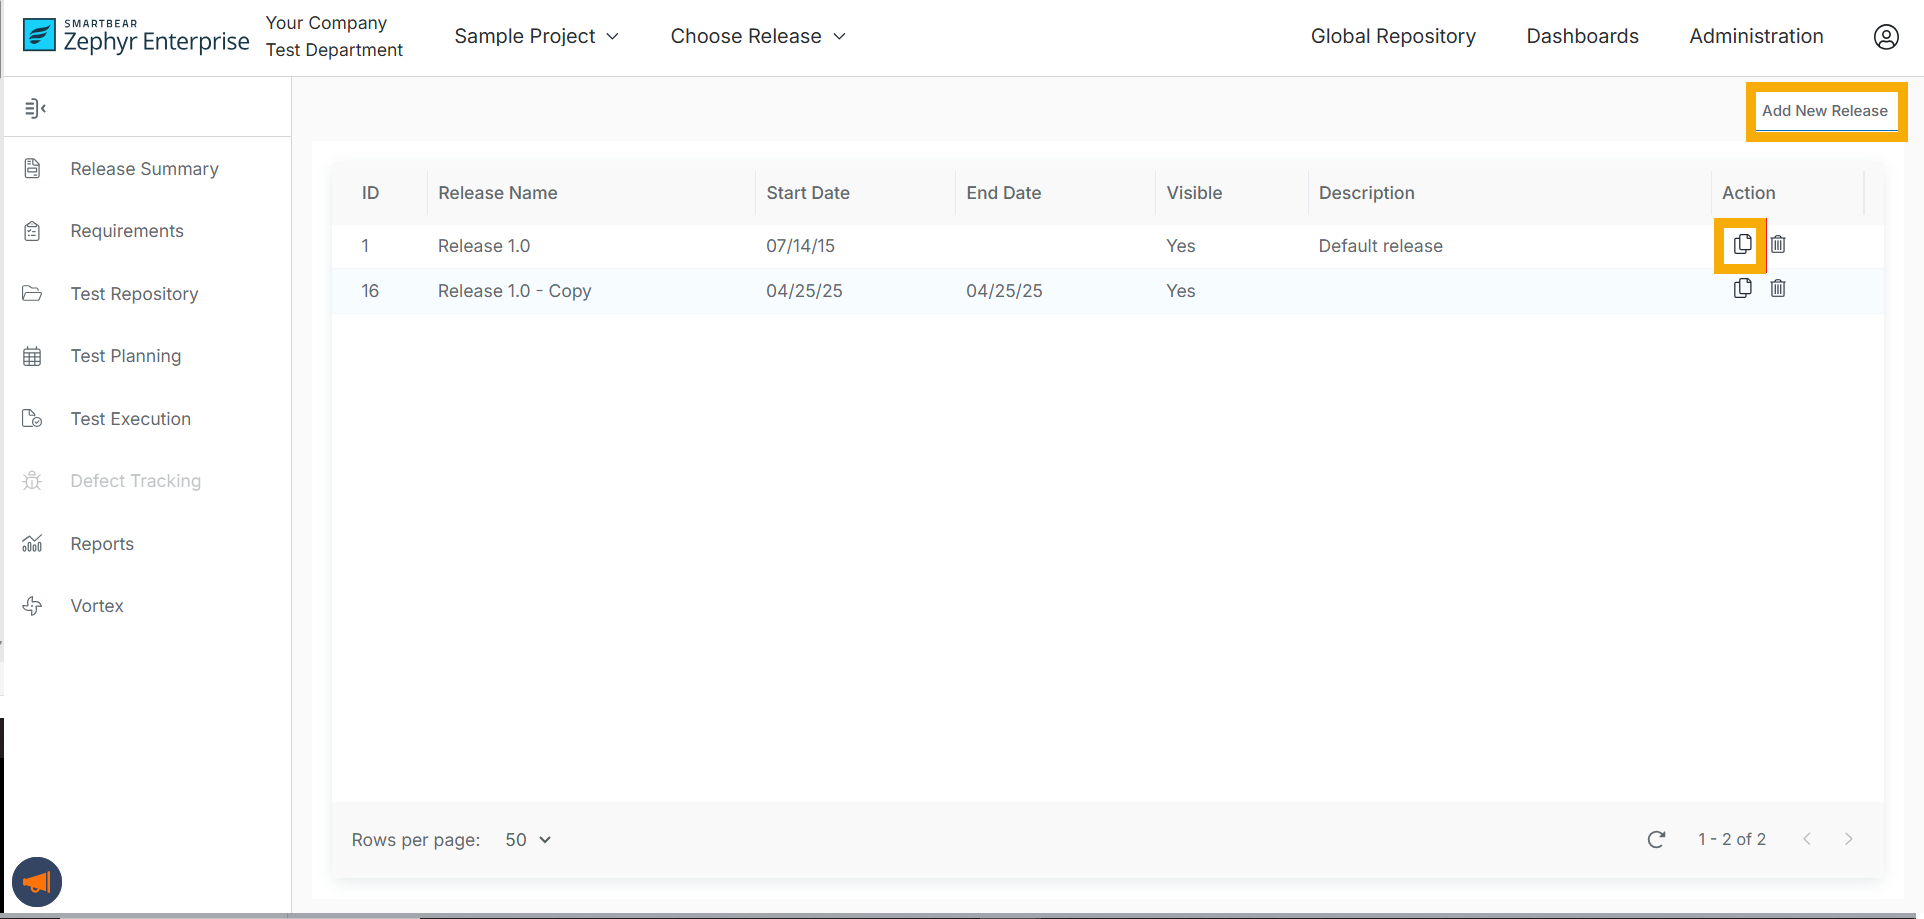
Go to Manage Release.
Start the clone using one of the following methods:
Click Add New Release, select Clone existing release on the Add or Clone Release dialog box, and then click Continue.
In the row of the release you want to clone, click the Clone icon.
In the warning dialog box, click Yes.
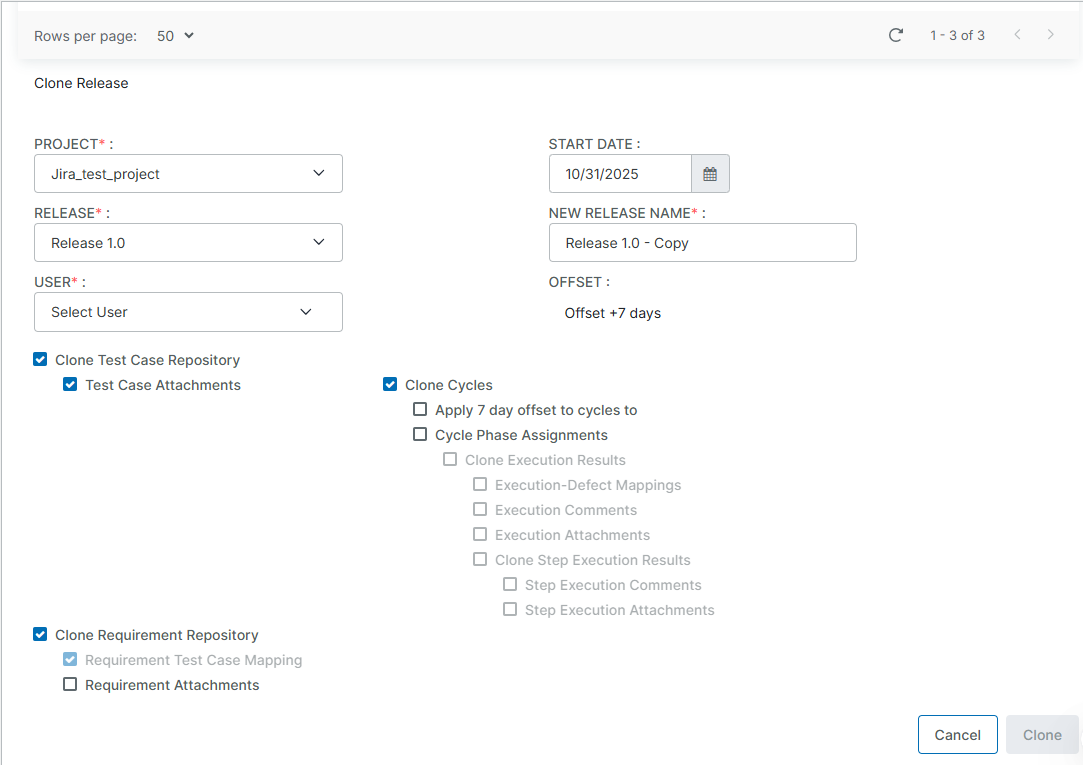
Select the project and the release you want to clone, and then select the user to assign to the cloned release.
Select the required item you want to clone: Test Case Repository, Requirement Repository, and Cycles.
Select the Start Date for the cloned release.
Review the New Release Name box. It shows the original release name followed by - Copy (for example, Release 2.0 - Copy). Keep the suggested name or enter a new one.
Click Clone.
In the confirmation dialog box, read the information carefully and click Yes to continue.
Click OK when the cloning completes.
Important
The Release clone process can take a significant amount of time to complete, depending on the release size. During the process, the original release will not be available. It is strongly recommended that this feature be used during off-peak hours and for you to notify the users. Once the process has begun, it cannot be stopped, paused, or canceled. Any attempt to have data created in the original release during the cloning process will be lost.